Marker-based augmented reality experiences depend on a target image to trigger the AR experience. That means that the device's camera has to recognize the target image before it can place the digital information on top of it or in its environment.
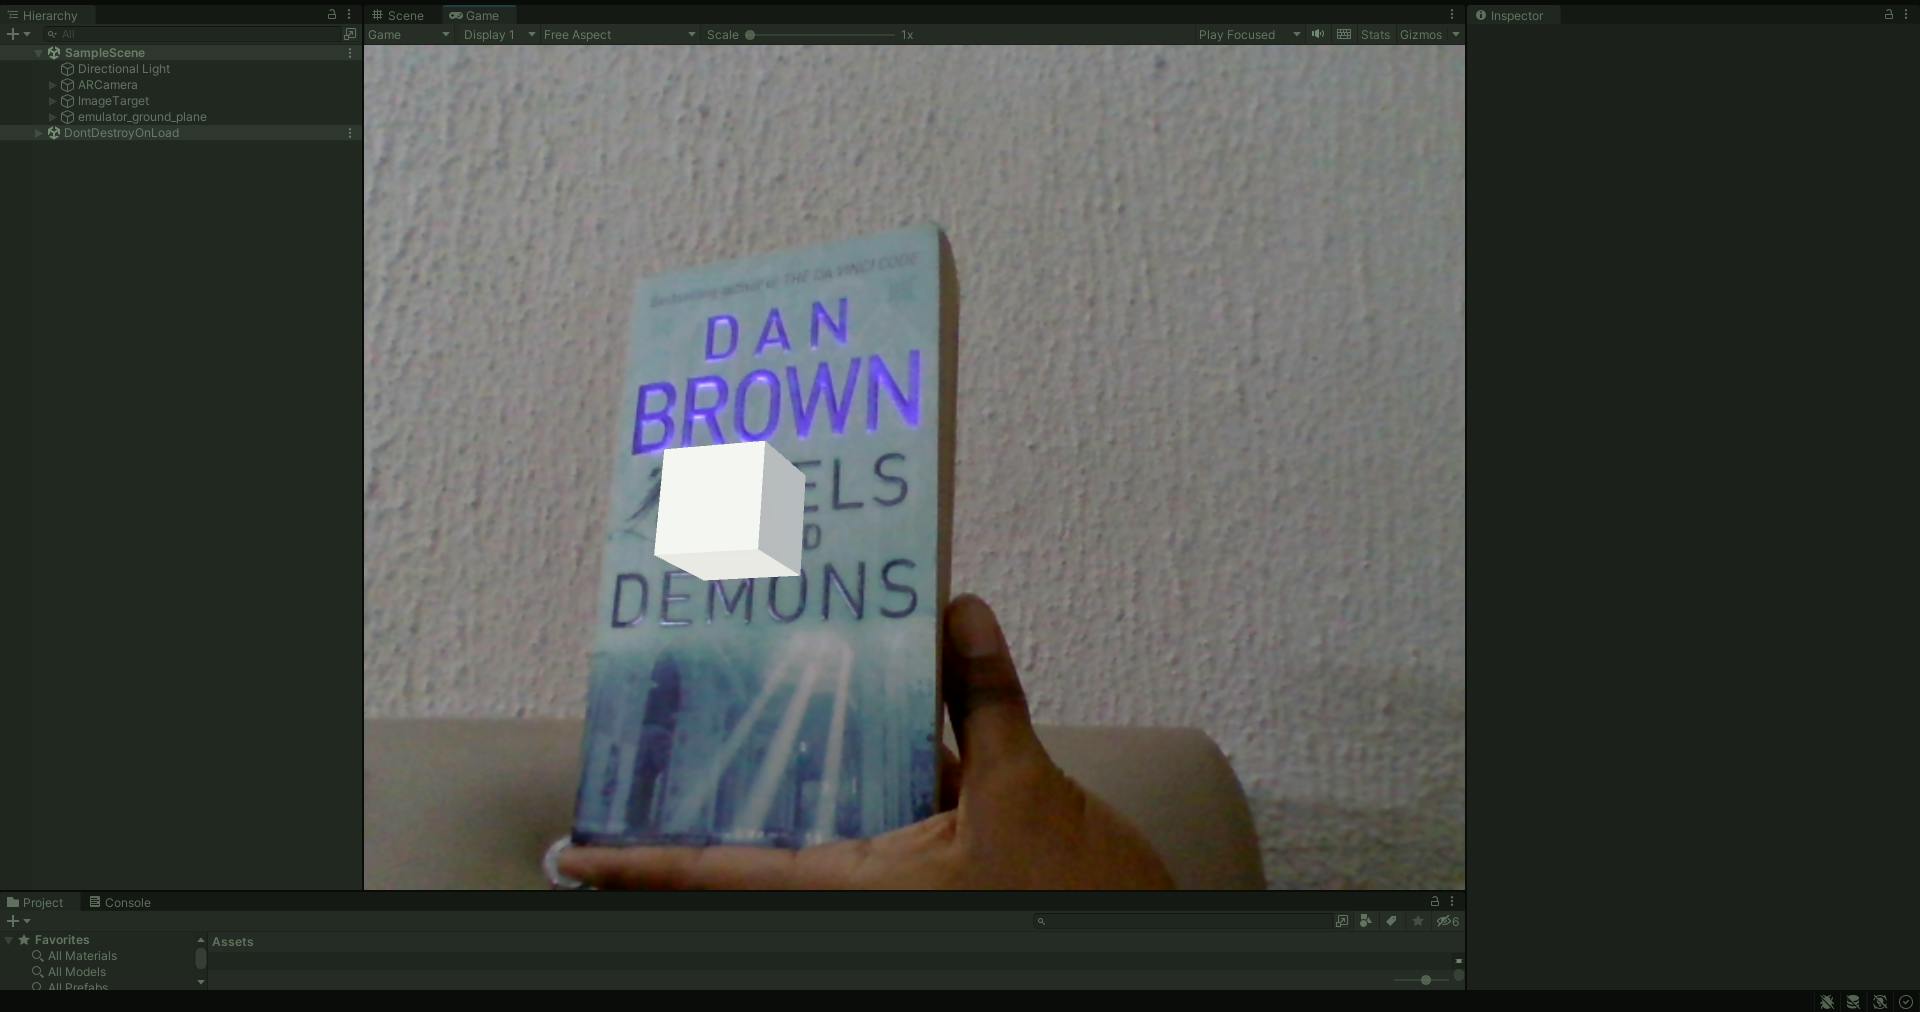
In this article, you will learn how to create an AR app that places a 3D object on the target image of your choice. At the end of this tutorial, it should look like the image below.
What is Vuforia Engine?
Vuforia Engine is a software development kit (SDK) that adds augmented reality and computer vision functionalities to your Unity project. It supports markerless and marker-based AR technology.
Prerequisites
Before we start the tutorial, you should have the following:
Unity 2021 (LTS) version or later installed.
Vuforia Engine developer account
Basic knowledge of the Unity Engine interface
Tutorial
Create a New Project
To create a new project, open Unity Hub and click on the New Project button at the top right of the screen. Then, select the 3D template and give the project a name. I will be naming mine "Vuforia Tutorial".
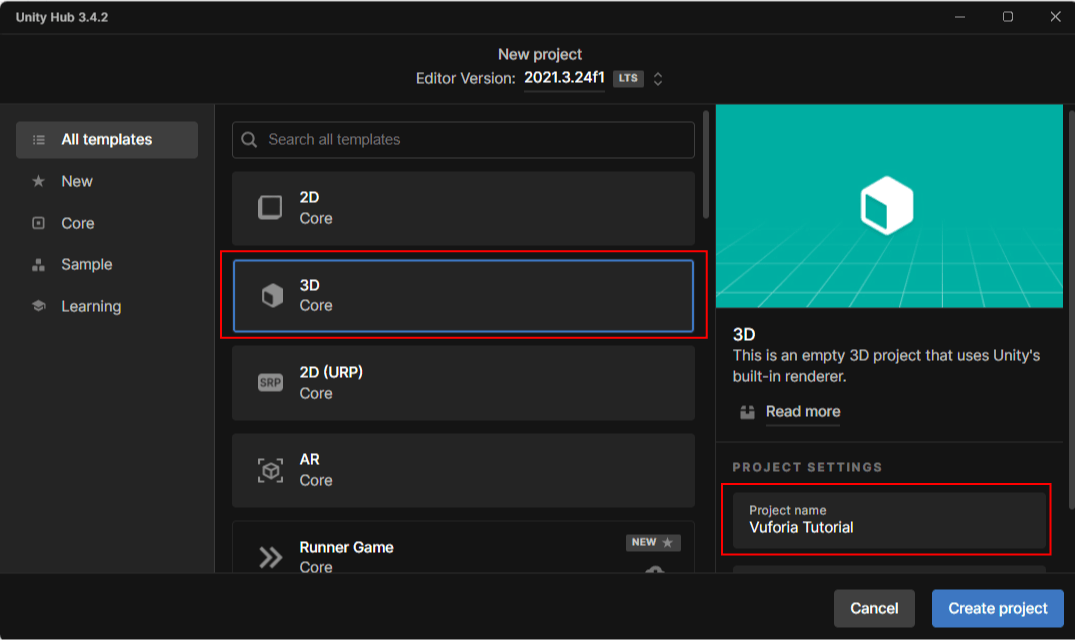
Now, click on Create Project and wait for the Unity Editor to open.
Download and Import the Vuforia Package
To start using Vuforia in Unity Engine, you have to download and import the Vuforia Unity package into the Editor. This package is packed with all Vuforia functionalities that make AR development in Unity easier.
To download the package, follow the steps below:
Create a Vuforia developer account. If you already have one, make sure you're logged in.
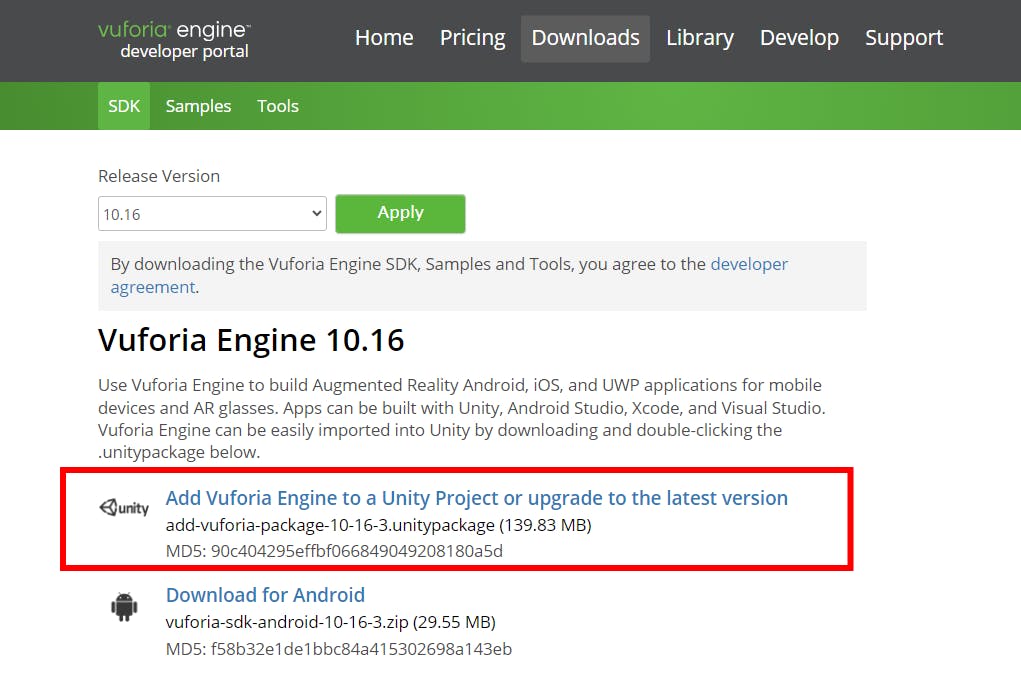
Go to the Downloads page and select the latest version of the SDK. Click on "Add Vuforia Engine to a Unity Project or upgrade to the latest version" to download the Unity package that we would be importing.
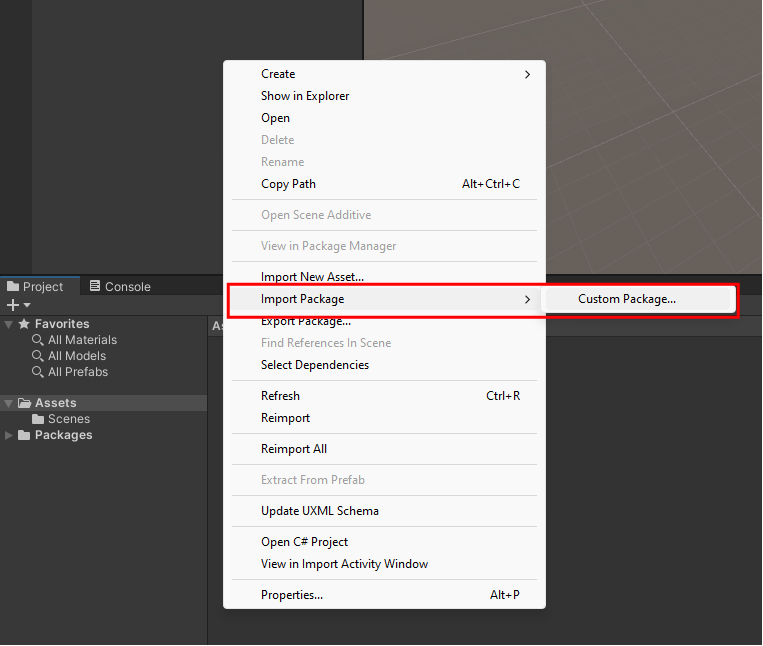
In the Unity Editor, right-click in the Assets folder of the Project Panel and click on Import Package. Then select Custom Package.
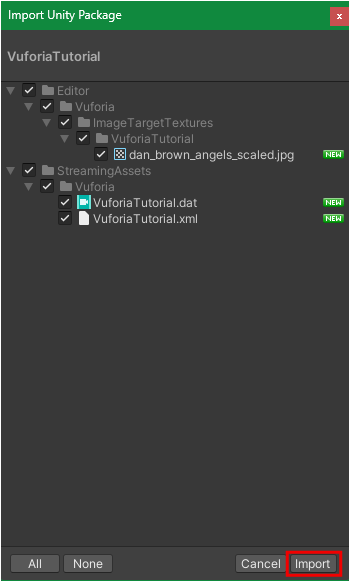
Go to the location of the Unity package and select it. A pop-up window will open in the Unity Editor showing the contents of the package. Make sure all the fields are selected then click Import.
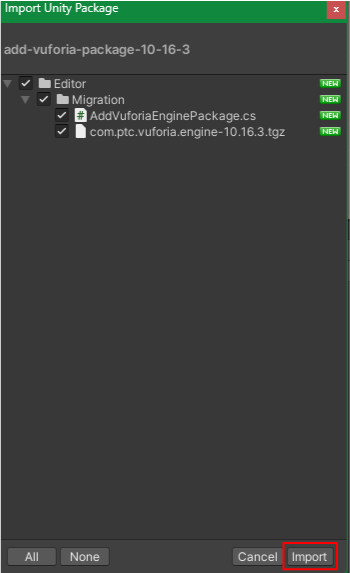
You now have Vuforia Engine functionalities in your Unity Project. If you right-click in the Hierarchy panel, you would see Vuforia Engine as part of the options in the dropdown.
Set Up the Vuforia Image Database
For marker-based technology to work, you need to have markers. These markers are images that you upload to the Vuforia Developer portal and download as a database into your Unity project.
Setting up the image target database in Vuforia is pretty straightforward. First, you need to get a license key.
Get the License Key
The license key is a code that you add to your project so it can access Vuforia Engine's features. To get the license key, follow these steps:
Go to the Vuforia Developer page and select the License Manager tab.
Click on Get Basic to get the license key for the free basic plan.

Type in a name for the License Key and check the box for the terms and conditions. Then, hit the confirm button to create the key.

Go back to the License Manager and click on the name of your license in the table.

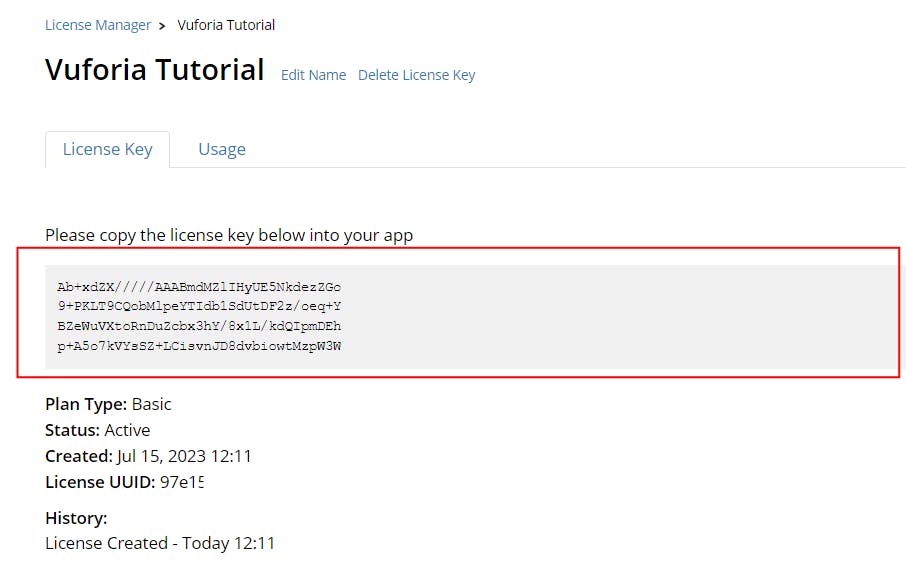
It will open a page that would have the code. Click on it to copy it. That is the code that would be put into the Vuforia configuration later.
Create the Target Database
All the targets you want to use must be added to a database that you can import and use inside your Unity Project and app. To create a target database, follow these steps:
Go to the Target Manager tab of the Developer portal and click on the Add Database button.

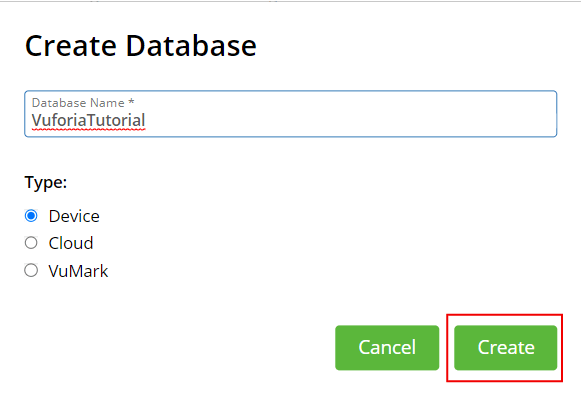
Give the database a name and set the type to Device. Then click on the Create button.
Note: You cannot use spaces when choosing a name for the database. You can use dashes or underscores if you must space out the words.
Now, it's time to add the target images.
Click on the new database you created in the table.
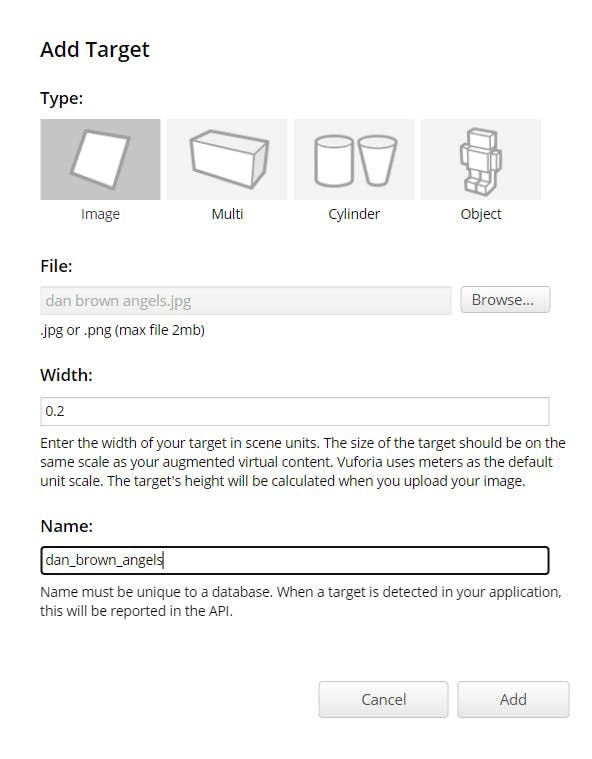
On the page that opens, click on the Add Target button. This will allow you to upload images into the database.

Upload the file and put in the correct dimensions of the target image (in meters). Give the target image a name, too. This name should be unique and cannot be reused in the same database.
You can add more images to the database and work with them in your project. When you add an image, it will have a rating. Five stars mean your image is a good marker and would work seamlessly as an image target. You should aim for at least three stars. This would improve the experience for yourself and your users.
Markers should be clear images with high contrast and resolution. They should also have distinct feature points that the camera can recognize so it is safe to stay away from gradients, patterns, and blends.
Click on Download Database to download the database as a Unity package.

Make sure the Development Platform is set to Unity Editor before downloading.
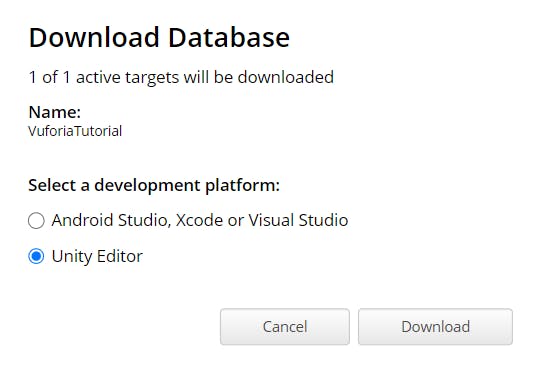
After a few seconds, the targets would be compiled into a Unity package that you can bring into Unity.
Create the Experience in Unity
In this part of the tutorial, we will work with the Vuforia functionalities and build the marker-based AR app in the Unity Editor.
Add the AR Camera
You need to use the Camera that comes with Vuforia.
In the Hierarchy Panel, right-click and go to Vuforia Engine > AR Camera. Accept the terms and conditions if the window pops up.
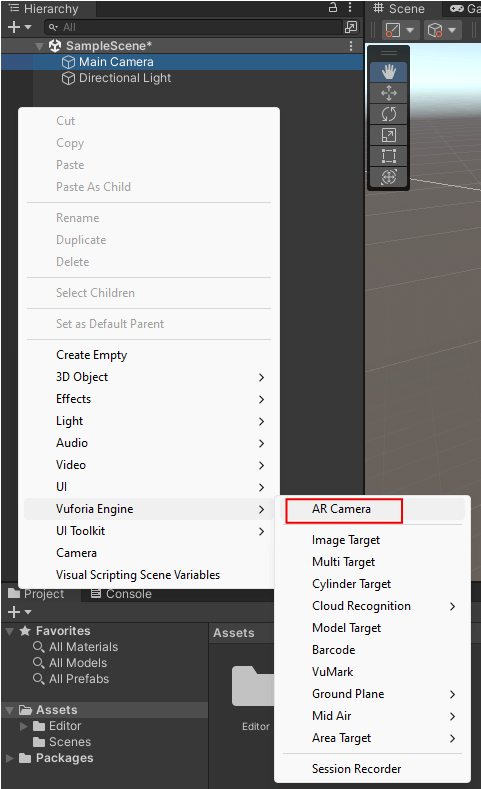
Delete the Main Camera object in the Hierarchy panel.
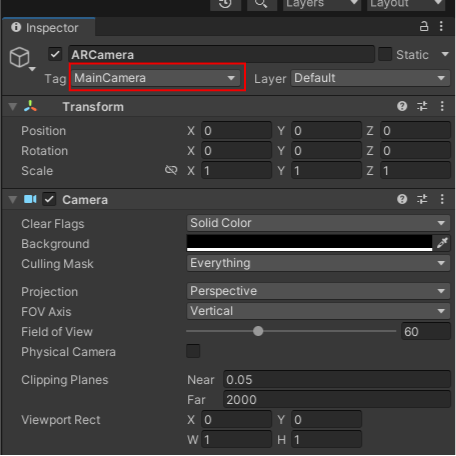
Select the AR Camera and go to the Inspector Panel. Ensure that tag on it is Main Camera.
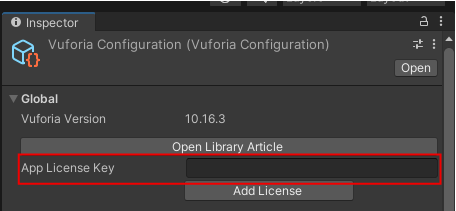
Still in the AR Camera's Inspector Panel, click on the Open Vuforia Engine Configuration button in the Vuforia Behaviour component.

Paste the license key you copied from the Vuforia Developer portal into the field for the app license key. You do not need to press enter. Just paste the key into the field.
Work With Image Targets
Now, we're going to add the image target features to the project
In the Projects panel, right-click inside the Assets folder and go to Import Package > Custom Package.
Import the Unity package database you downloaded from the Vuforia Developer Portal.
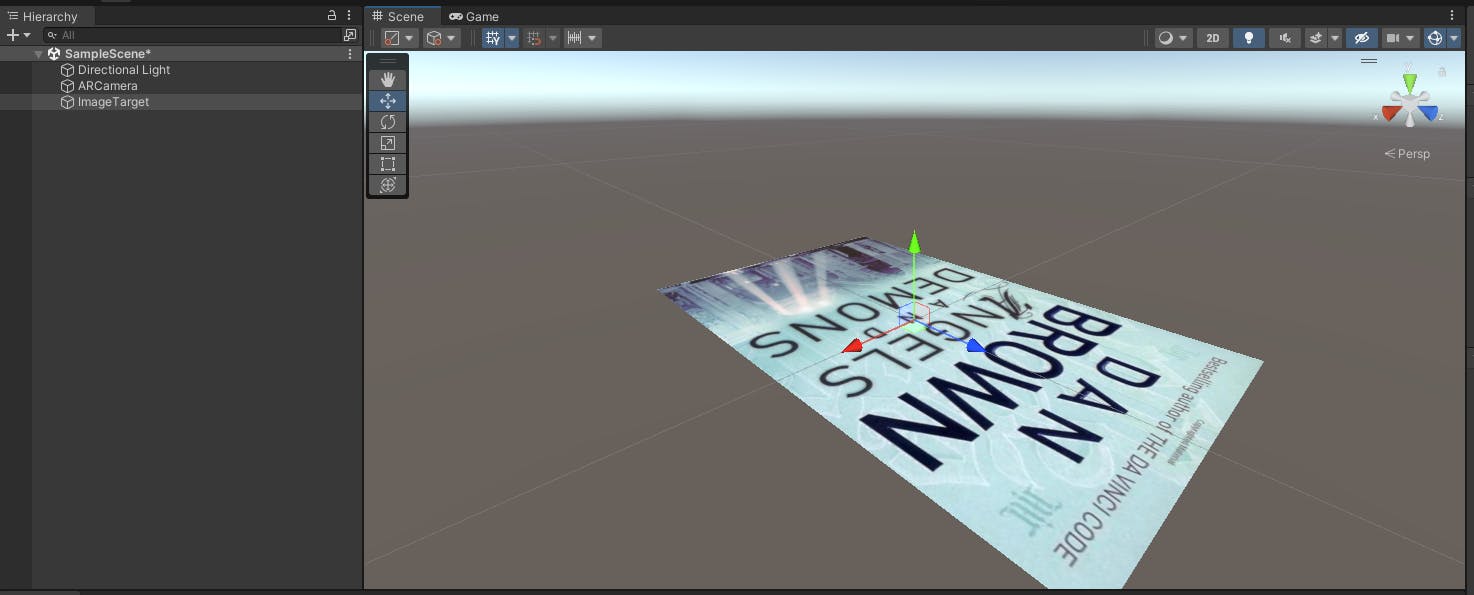
In the Hierarchy panel, right-click and go to Vuforia Engine > Image Target.
With the Image Target object selected, go to the Inspector panel and navigate to the Image Target Behaviour component.
Change the Type to From Database. Now, you can choose the name of the database and which target you want to use in the drop-down selections.

You should now see the image target in the Scene panel.
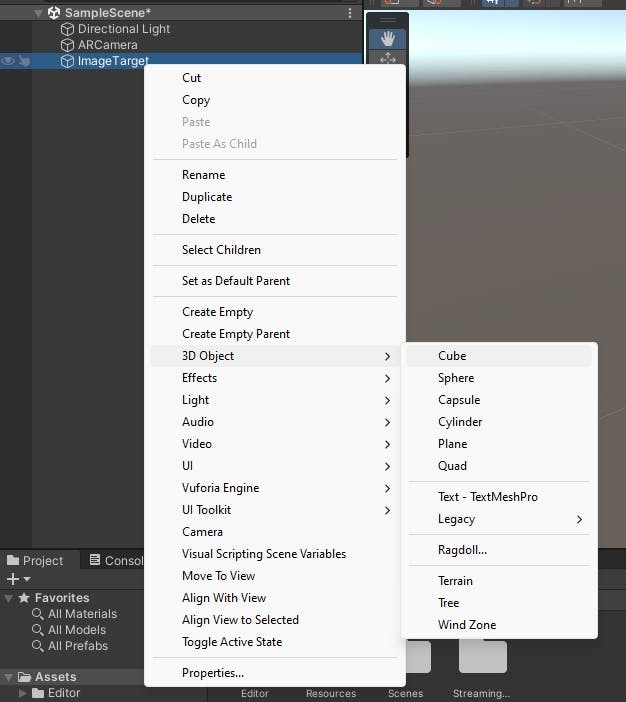
With the Image Target selected in the Hierarchy panel, right-click and go to 3D Object > Cube. You can choose any other 3D object or bring in your own model. However, for simplicity, we will be using the cube.
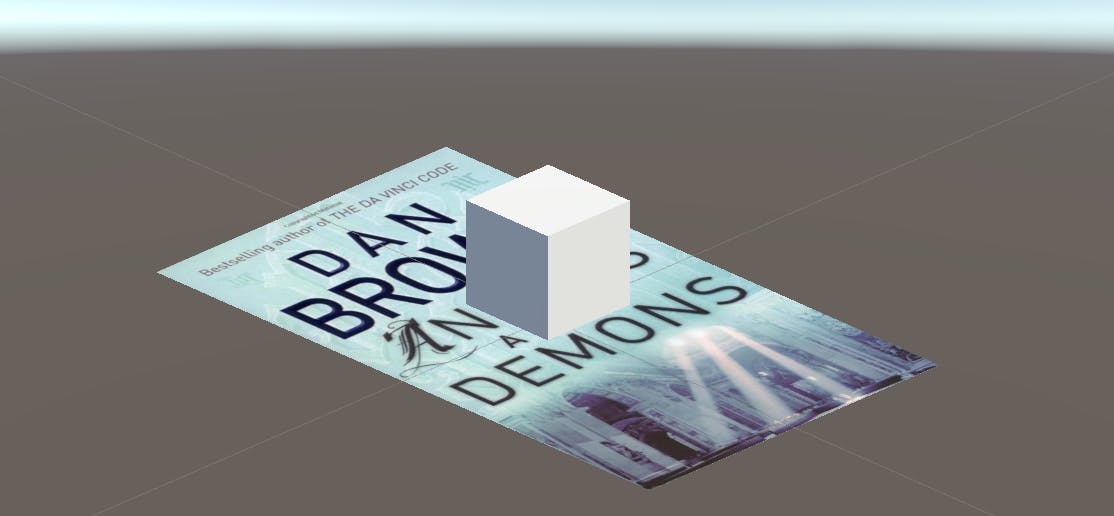
The cube will appear on top of the image target. Scale the cube to your preferred size and move it to a location of your choice. I will be placing my cube directly on top of the image target.
Test the Experience
You can test the marker-based AR experience in the Unity Editor directly or by building it as an app to your device. It is always good to test inside the Editor first.
To test in the editor, press the Play button at the top of the window and go to the Game panel.

Point the target at the webcam (or move the webcam in front of the target) and you would see the cube on top of it.
Conclusion
Vuforia Engine makes building augmented reality experiences easier and faster, even for beginners.
In this article, you have learnt about markers, created a database in Vuforia and built a simple marker-based AR experience in Unity Engine.

