


Detecting planes is an important process that has to be carried out when creating a world AR experience. Planes are flat or level surfaces and can be horizontal or vertical. Floors, tabletops, and walls are all planes. The 3D objects used in your AR experiences could be placed on these planes.
This tutorial will teach you how to create an app to detect planes in your environment using ARFoundation in Unity Engine. You would later use this plane for projects in Augmented Reality.
Prerequisites
To follow this tutorial, you will need the following:
Unity 2021 (LTS) version or later installed.
Android Build Support platform.
Tutorial
In this part, you will create the Unity Project, set it up for Plane Detection and build an app to test it on an Android Device.
Set Up Your Unity Project
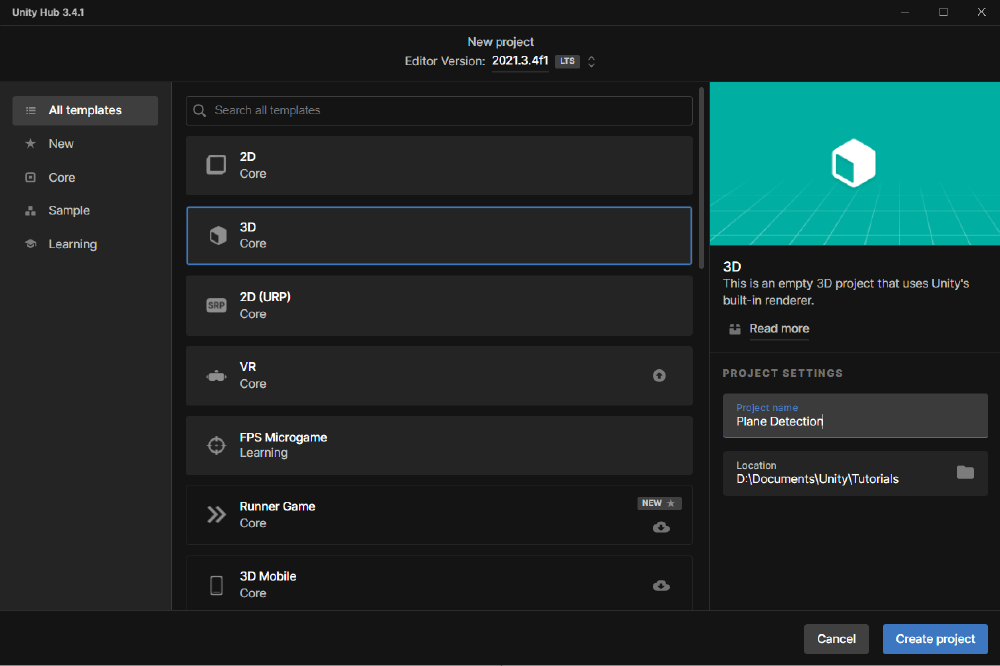
- Open Unity Hub and create a new project using the 3D template.
- In Unity, go to Windows and then Package Manager. Search for and install the ARFoundation and ARCore XR Plugin.

When they are installed, there will be checkmarks next to their names.
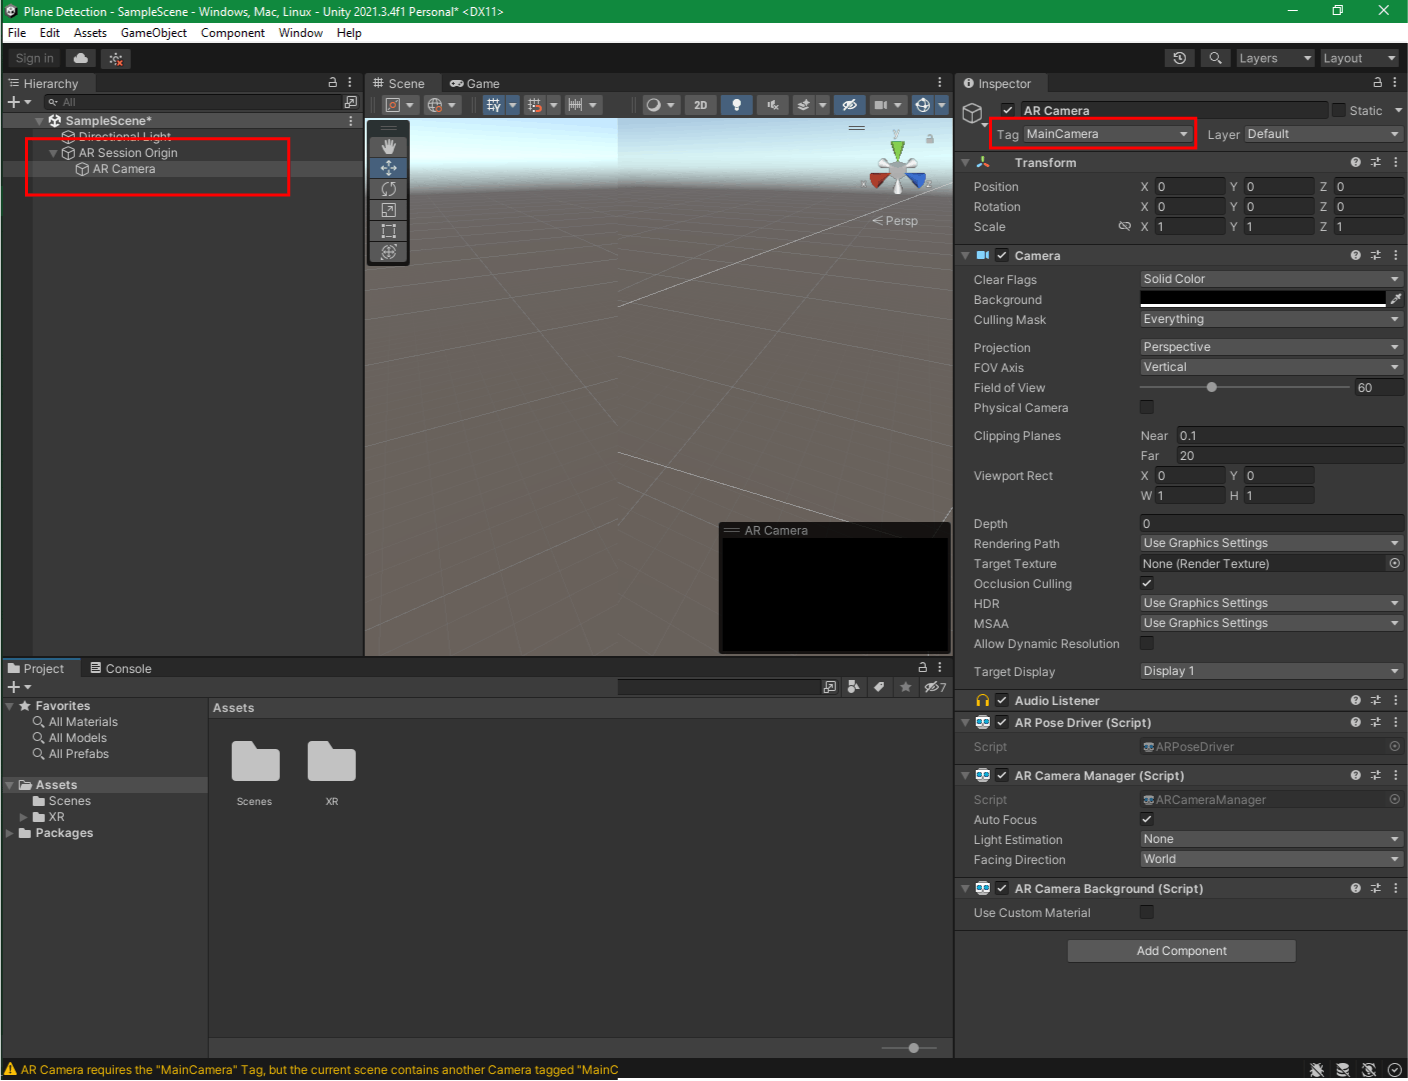
In the Hierarchy Panel, delete the Main Camera.
Now, still in the Hierarchy Panel, right-click and go to XR and select the AR Session Origin. An AR Camera would be a child of the AR Session Origin. Ensure that the AR Camera is tagged Main Camera in the Inspector Panel**.**
Right-click again, go to XR and then select AR Session Origin. In the Inspector Panel, click on Add Component and search for AR Plane Manager. In the components, there will be fields for a script, a Plane Prefab, and Detection Mode. Leave the Detection Mode as "Everything". We will fill in the Plane Prefab field with a Prefab.

Create The Plane Prefab
To create the Plane prefab, you need to fill in the field with a prefab or the AR Default Plane. Follow the steps below to do so:
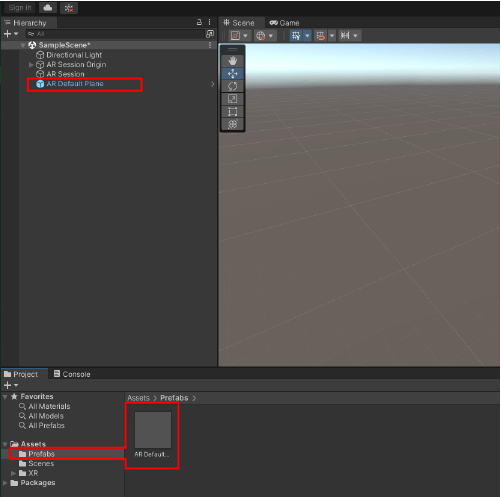
Right-click in the Hierarchy Panel and go to XR. Select the AR Default Plane.
In the Project Panel, go to Assets and create a folder. Name it Prefabs.
To create a folder, right-click in the Assets space, go to Create, and select Folder.
Drag the AR Default Plane into the Prefabs folder. It would turn the object into a prefab. In the Hierarchy Panel, the AR Default Plane would be in blue.
Delete the AR Default Plane from the Hierarchy Panel.
Click on the AR Session Origin, and go to the Inspector Panel. Drag the AR Default Plane from the Prefabs Folder to the Plane Prefabs field in the AR Plane Manager Component.
Build The App
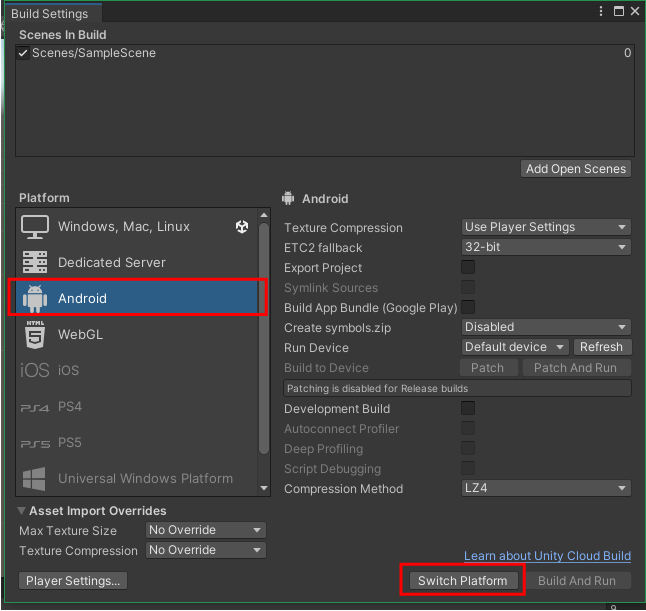
Press CTRL + Shift + B to open the Build Settings. You could also go to Files and select Build Settings from the drop-down.
Click on Add Open Scenes to add a scene. If there is no scene added to your build, the app will just be a black screen.
Go to Platforms and change it from Windows to Android. Click on Switch Platform to effect the change.
Now, click on Build and save the APK.
Send the APK file to your phone and install it.
When you open the app, your device will locate and highlight these planes in yellow.
Conclusion
In this tutorial, you have built an app to detect both Horizontal and vertical planes in your surroundings. Try to test the app in an open clear space free of clutter.